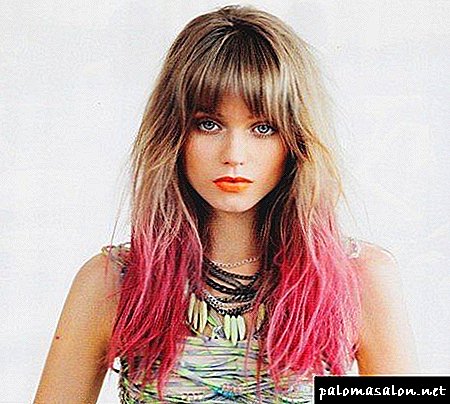
It is believed that the braid is a boring, outdated and too conservative hairstyle worn by a woman with limited imagination. Such an assertion is an absolute fallacy. Enough of a creative approach and a little ingenuity, as the notorious braid is transformed into the most real work of art, a kind of standard of hairdressing.
At the same time, in most cases, to create such a masterpiece no special elaborate fixtures and accessories will be required. Narrow or wide tapes are enough.

Basic weaving options
There is a great variety of braid weaving patterns. Each is characterized by its unique beauty and charm. The most popular options are Spikelets, Baskets and 3D braids. Consider one of the types of weaving - spikelet. This is the simplest weaving technique. Anyone can easily master it.
The first thing that needs to be done is to apply hair styling. You can use varnish, light foam or gel. Next, you need to select a small strand in the area of the roots and divide it into three components. Do not rush. Strands must be thin. Only in this case, the hairstyle will be more neat and tender.
The principle of weaving is based on the crossing of the right and left parts. In the next round it is necessary to grab the lower part of the hair and gently weave it into the next ear.
The strengths of this hairstyle
A variety of braids have gained popularity not so long ago. At the beginning of the twenty-first century, they were considered a relic of past years. But fashion is an unpredictable phenomenon, it is difficult to predict.
Braid with ribbons has many advantages:
- This is, without doubt, a universal hairstyle, it will be appropriate at any event (and on a walk with a friend, and at a responsible business meeting),
- hairstyle can be kept for several days, and in some cases even a whole week (a ribbon adds vitality to a pigtail),
- there are lots of techniques and techniques that allow to weave a ribbon into a braid,
- hairstyle perfectly keeps its shape even under the headdress,
- Spit with a ribbon - a great way to impress others with their skill.
Braids with ribbons for a long time will not lose popularity. Therefore, it will not be superfluous to get acquainted with the technique of their weaving. Such knowledge will help to remain in trend and look perfect under any circumstances.

Important stuff and necessary accessories
All necessary materials should be prepared in advance, before the beginning of the weaving process. In this case, nothing will distract from the most important thing - from weaving beautiful braids.
- ribbon - it should be a little longer than the hair itself,
- styling products
- a set of combs (you will need a large one with soft bristles and a thin one with sparse teeth and a sharp end),
- gum - and need thin and thick (each type should be a few pieces),
- other materials (these may be: special clips, crabs, stealth, studs, etc.).
Buying all of the above does not hit hard on the budget. The cost of these items is low. Later they can be used to create other hairstyles.
Classical three-strand weave pattern
The question arises: "How to weave a ribbon into such a braid?". The first few times weaving may fail. You should not get upset because of this, you need to calmly continue what was started. It will be especially difficult when a woman does her hair on her hair. It is better to practice before this on a friend or (even better) on a mannequin.
After several successful attempts, it will be quite easy to repeat it on your head. This method of weaving is very simple, it can be mastered in the shortest possible time and without much effort. The main thing is to have the desire to do it!
- The first rule of any hairstyle is clean hair. Therefore, before you begin to create a masterpiece, you need to thoroughly wash your head and comb the strands.
- Then all the hair is divided into three equal parts. Middle curl need to tie a ribbon.
- Then the first strand is superimposed on the second (this happens from left to right), thread it under the ribbon and impose a third. Then the ribbon is held under the central curl and pushed between the second and third strands. Weaving continues according to the described algorithm. After it was possible to weave the hair, they need to be fixed with a rubber band.
To fix the result, you can lightly spray the hair with a lacquer of a medium degree of fixation. This tool will help hair look more natural. When using a more resistant option, the effect of crusts will appear on the hair. It looks completely unattractive.
Four strand braid
Every woman spends a lot of time and energy in pursuit of beauty. Fantasy in this important matter knows no bounds. It is not surprising that today there is such a variety of variations of weaving braids with ribbons. It is necessary to allocate time and how to understand the basics of technology for creating such hairstyles. Then you can create new unusual (modern and very beautiful) hairstyles at least every day.
Secrets of the ideal braid, made by a four-row pattern.
- To make the braid look more voluminous, it is recommended to include hair on both sides as weaving.
- As for ribbons - they can be of any color, texture, thickness, material. Select the characteristics of this accessory should be directly to the side.
Pigtail will be a harmonious addition to any image.
Five-strand braids
Weaving two ribbons into a braid at once is not an easy task. It will require a thorough preliminary training. The following recommendations will help to achieve the desired result in the shortest possible time.
- Need to properly comb your hair.
- It is recommended to sprinkle a little hair with water. In this case, the curls will become more pliable, it will be significantly easier to work with them.
- Separate a small portion of hair in the crown area. Under this part of the curls tie a long ribbon. It must be tied in such a way that the knot divides it into two halves. Those. in the end you get two ribbons. Separated hair is divided into three equal parts. The hair is distributed in the following order: two strands, two ribbons, an extreme strand. The countdown should be in the direction: from left to right. Ribbons will replace the other two strands of hair.
- Weaving begins on the left side. The extreme left strand is intertwined with the second. The first is passed under the second. Next to the first ribbon and stretched under the second ribbon. At the same time, the left hand should hold one curl and a pair of ribbons.
- You need to start taking the hair on the right side: the extreme strand is laid under the nearby one. Next, impose on one tape and pass under the second.
- Ribbons can not be interchanged.
- The above steps are repeated on the rest of the hair. Only curls now grab from a common head of hair. To do this, separate the strand to the left of the temple and fasten it with the extreme left strand. So begins the interweaving. United curls spend under the second pryadochkoy and throw on the first tape. Thrust under the second. In the left hand in the end should remain one strand and both ribbons.
- The same manipulations are carried out with the second part. The strand is picked up to the right of the temple and is connected to the outermost curl. Then the hair is passed through the tape. They can not be swapped.
- With the right alternation of these actions, it will very soon be possible to get an inverted pigtail of their three strands and with a ribbon in the center.
- After the weaving is finished, the tip of the braid should be fixed with a rubber band or tape.
- If you slightly stretch the extreme curls, hairstyle will look more voluminous, openwork.
- To consolidate the effect should spray hair with lacquer.
A few words about the French braids
Unexpectedly, but the fact is that this kind of weaving has nothing to do with France. The first French braids mastered representatives of the south-eastern part of Algeria. This conclusion was made thanks to wall drawings and other ancient artifacts. A little later, these women began to make hairstyles of ancient Greece.
French braids look attractive. They are always elegant and spectacular. Therefore, fashion does not pass on them. To master the technique of weaving can any girl or woman. If desired, you can vary the hairstyle. To do this, just need to add a ribbon to it.
Spit waterfall
The technique of weaving such braids at first glance seems very simple. But this is a misconception. Few people will be able to master the technique on the first attempt. But do not stop half way. All efforts are guaranteed to be justified. A girl who succeeds in mastering the secrets of creating such a hairstyle can, at any time and without much difficulty, create for herself an ideal: a gentle and modern hairstyle.
- It creates a smooth parting in the head area.
- Allocate a small area at the parting in the form of a square and divide it into three equal strands.
- On the middle curl attached tape.
- Initially, weaving is carried out according to the scheme for creating a classic braid: the strand lies on the left side, the ribbon is on the bottom, on the right - the ribbon on the top.
- In order for a regular braid to be transformed into a waterfall, it is necessary to leave an extreme strand with each new curl and replace it with a new one.
- When weaving reaches the level of the ear on the other side of the head, you should return to the classical method of weaving (without adding new curls).
Such hairstyles are especially good in summer and spring. In these seasons, girls wear luxurious dresses from the lightest fabrics, and the waterfall spit becomes the best addition to these outfits.
Thus, we conclude that the technology of weaving such braids is not easy, but it is certainly worth mastering it. In the future, you can include in the hair two or three ribbons. This will add spit extra luxury.
A beautiful braid with a bright ribbon will add an image of femininity and fill it with special softness and tenderness.
And in conclusion, we offer some more simple braid weaving schemes with ribbons.
Materials necessary for weaving braids
For the manufacture of such hairstyles, it is necessary to carefully consider what you will use during weaving. If you prepare everything in advance, it will save you from unnecessary problems in the process of weaving itself. The minimum set for weaving includes:
- Ribbon for hair. You can use any color and width, and the length should be significantly longer than the hair, because you will weave it in hair.
- If you have naughty hair, then the necessary funds for styling.
- Thin, small rezinochki for intermediate fixation of hair.
- Several combs - comb with frequent teeth, a large comb.
- Hairpins, invisible.

Basic hairstyles with ribbons
With ribbons you can make a lot of original hairstyles. Very original look braid of four strands . To weave it, it is necessary to comb the hair at the side of the parting. A curl is separated from the left side and a ribbon is tied at its beginning. The rest of the strand is divided into three parts. To quickly braid braid curls can be numbered for yourself. Strand with ribbon is considered the third.
The general algorithm for weaving such a spit looks like this:
- The first strand is passed under the second and placed on the third, and the fourth is placed on the first and passes under the third.
- The hair is added to the second strand; it is passed under the fourth and applied to the third.
- To the first strand add curls on the right side, put on the second and pass under the third.
After the braiding is finished, it is fixed. On the other side of the parting, the same braid is woven. For beauty, strands of braids can be slightly extended. The braids are fixed with pins. If desired, they can be left hanging down.

Similarly, you can weave a braid of three strands. . To do this, the hair is divided into three strands, the middle of which is fastened with tape.
The first curl covers the second and passes under the tape, then placed on the third.

The ribbon intersects the central strand and is placed between the second and third strands.

At the end of the braid is fixed, and its links are slightly released.

Options for children's hairstyles
Braids with ribbons are very convenient for children. So they will always have their hair collected and do not interfere, for example, during lessons or playing sports. Children's hairstyles also do not differ complicated technique.
The original hairstyle will be a braid from the tail. . This is the fastest option to weave a braid. Hair must be collected at the back of the head, make a strong tail.

The tape slips under the rubber band.

The tail must be divided in half, and the ribbon pulled in the middle of the tail.


Further, the braid is woven according to the standard scheme. The tip of the braid is tied.

Children's braids with ribbons have several varieties. Another interesting option is also done on the basis of the tail. Hair is collected in the tail, which is divided into 4 parts. The ribbon is interlaced with two strands. The overall pattern looks the same as the weaving of a four-strand braid.

 In general, children's hairstyles are not much different from adults, especially if they are made for long hair, the pattern of weaving looks elementary. The most important thing in the process of weaving children's braids is not to over-pull the hair, because in children, hair is more fragile and tender, strong tightening may damage them
it and cause a headache.
Another elementary version of a pigtail with a ribbon is suitable for both children and adults. This is a single-strand pigtail. . This is the easiest kind of pigtail to start with, mastering this art. Hair should be moistened with water before braiding. On the crown one strand is separated, and under it a tail is assembled, on which the hair band is fixed. A loop to the left is formed from the selected strand. The hairband is put on a loop and wrapped around the strand. The main thing is not to allow her to be disheveled. The final step is that the free hair is caught from the right side and the next loop is made. The steps are repeated. Hinges are desirable to pull each other, because This will give a more delicate pattern.

Thus, weaving braids with ribbons is not such a difficult task. The main thing is to have patience and carefully weave all the instructions for weaving techniques before weaving. Then you will have an original and stylish hairstyle, which will cause admiration from people around you.
What is required for work
Before you start work, you need to prepare everything you need so that you do not get distracted by other things during work. For this you will need:
 Hairbrushes Usually two combs are needed for work: thin with teeth and a large brush.
- Studs, clamps, crabs, invisible.
- Gum, preferably thin.
- Styling products. It can be both gel and mousse. At the end of the work you will need varnish to fix the result.
- Tape. Since weaving braids with ribbons is considered, we will need it. The color and width of the tape - at will, but the length should exceed the length of your hair.
 Hairbrushes Usually two combs are needed for work: thin with teeth and a large brush.
The main advantages of hair
Among the advantages of this hairstyle are the following:
- This is a great option in the cold season, as it perfectly preserves its shape after a headdress,
- This is a universal hairstyle that is suitable for any celebration or just for every day,
- This is a great way to show your personality and amaze others with your skills.
Step-by-step weaving and schemes with the description
 The variations and patterns of weaving braids set. Each weaving is unique and beautiful in its own way. The most popular options today are: spikelet (french spikelet) and 3D braids (consist of 4 or more strands).
It is better to start with something simple and easy, especially for beginners, and then move on to more complex weaving. The main criterion in weaving will be the purity of the hair.
Single Spit Ribbon
The order of execution:
 Good to comb your hair. To make the hair more pliable, you can moisten it with water or treat it with a styling agent (mousse, gel, you can use wax for fine hair, it weights the hair).
- Scroll to the top of one large strand. Under this strand, make a small tail and fix the tape on it.
- From the main strand create a smooth loop to the left, it can be secured with a barrette or crab. The decorative element, in turn, will be on the right.
- Tape the loop and wind around it tightly so that the strand does not break up.
- Then grab free hair from the right side and create a second loop.
- Then again put the decorative element on the loop and wind it.
- When weaving a loop, it is worthwhile to pull each other up well, then there will be a more interesting pattern.
 Good to comb your hair. To make the hair more pliable, you can moisten it with water or treat it with a styling agent (mousse, gel, you can use wax for fine hair, it weights the hair).
Initially, this braid seems very simple, but it is not. This hairstyle can serve as an excellent alternative for every day, and interwoven elements can change the hairstyle into a more evening and solemn version.
Of the three strands and ribbon
This is a classic braid weave pattern. Only this time the ribbon is woven into it. Sometimes it may not happen the first time, but do not despair and learn. The most difficult thing is to do this hairstyle on your hair, so for a workout you can try on a friend or on a mannequin.
The procedure for creating hairstyles is as follows:
 The hair is divided into three equal parts. Middle curl wrap the braid.
- Then the first strand is superimposed on the second (from left to right), threaded under the braid and on top impose a third.
- After the band is held under the central curl and pushed between the second and third strands.
- Continue weaving according to this scheme until you finish the hair. After tying the braid or secure with a rubber band (barrette).
 The hair is divided into three equal parts. Middle curl wrap the braid.
It is possible to fix a hairstyle with varnish at the end, but it is undesirable to use a strong fixation, it forms a crust and the hairstyle looks unnatural.
Four-spin with one central
A huge plus of this hairstyle is that it looks voluminous on any hair. To make the braid look more voluminous, you need to include, as weaving, hair on both sides.
To make this hairstyle, follow the instructions:
 Separate the hair strand and divide it into 4 parts (if you do with a ribbon, then divide it into 3 parts and fasten one tape side by side).
- Put the leftmost strand under the near and on the tape.
- Next, put the rightmost strand on the near and under the tape.
- Take the leftmost strand, add a sublet to it and place it under the near and ON tape.
- Next, take the rightmost strand, add a podlet to it and put it on the near strand and UNDER tape.
- Continue to weave the braid according to this scheme until the end (POD-ON-ON-POD).
- Once finished, release the extreme strands to release a little so that the spit is more voluminous.
 Separate the hair strand and divide it into 4 parts (if you do with a ribbon, then divide it into 3 parts and fasten one tape side by side).
This scheme is more complicated than the previous ones, but after you master it, the rest will be easier for you. And learning skills will be faster.
Five-strand braid with ribbon in the center
The French version of the five strand braids is woven in the previous pattern. If you have mastered the previous scheme quickly, then there will be no problems with this.
Step-by-step instruction:
 Divide hair into 4 parts.
- Fix the ribbon in the middle.
- The next step is to weave a braid, alternately placing the extreme strands ON or UNDER the strands closest to them, and so on UNDER or ON a ribbon.
- First steps braid without adding hair from loose hair.
- From the next step “POD” add to the extreme strands a small strand of loose hair.
- During weaving, stretch the strands that are hidden so that the braid structure is visible.
- After you have finished weaving a braid, pull out a little extreme strands.
 Divide hair into 4 parts.
After you have mastered these patterns of weaving braids with ribbons, you can begin to weave complex patterns (six-and seven-strand). The interweaving of decorative elements complicates the technique of hair-making a little, but the type of hair-style becomes more original and unique.
Braids with ribbons
Tapes are one of the best accessory options for lovers of various weaving. They will add to any spit of brightness, freshness and solemn look. Some may say that braids with ribbons are only for little girls, but this statement is erroneous. After all, if you choose the right material and color of the product, then the perfect look is guaranteed for women of any age.
Ribbons for weaving can be taken different: satin, openwork, multi-colored, bright, monophonic, narrow or wide. The main thing is that the length of the product exceeds the length of the hair, as usually when weaving the ribbon is mixed in half. And of course, that would fit the occasion, in harmony with the image.
Braid with ribbon from the tail
This hairstyle is perfect for girls every day. With her you can just walk and go to school is not a shame.
- We take a bright ribbon about 1.5-2 cm wide and more than twice the length of hair. We fold in half, in the crochet we make a bow. The hair is tied into a high tail with an ordinary rubber band. We tie the ribbon, so that the bow turned out on top.
- We divide the curls into three equal strands and make the first binding as in the usual French braid, while the ends of the tape are not affected.
- Next, push the tape between the left and middle strands up and hide it back down into the gap between the middle and right. Thus it turns out that the tape wraps the middle strand.
- We make the next cover, wrapping the ribbon around the middle link in the same way.
- We do the same not tricky movements to the end. The tip is fixed with a thin rubber band. A top tie with ribbon.
- Our miracle braid is ready, admiring the result.
The tail braid version can be called more childish. But therefore, the principle can be braided braid and yourself. Simply making the tail on the side from the bottom and replacing the bright wide ribbon with a more modest one. https://www.youtube.com/watch?v=hCZJpWfhdKs
French braid with three ribbons
For this hairstyle, we need: a comb, three silicone rubber bands and three multi-colored ribbons. Weave braid easier than ever, the main thing is to make everything neat.
- We take part of the hair from the forehead, fasten with a clip and remove it on the forehead. Immediately after it, uniformly at the same distance from each other, fasten the tape to the hair. This will help us previously cooked silicone gum. We return to the place the bonded upper curls, covering the beginning of the fastenings with them and take the first three locks with ribbons in our hands. In each order should get one ribbon.
- Further weave a usual French braid. Though simple, at least the opposite. After each binding we correct the weaving by pushing the ribbon to the top.
- Dopple to the edge fix the end of the rubber band or tie the remnants of the tape.
Another version of the braids with tape on the side
- We brush hair on the side. Straight bangs pinned to taste with a barrette or a small crab on its side, or up.
- The hair is divided into two equal parts, and to the base we apply a tape folded in two. Thus we have four strands, two of hair and two of tape.
- We wrap the ribbon around one of the strands to fix it a little. Also, so that she would not crawl for convenience, you can pin it up for a while with a hairpin.
- We make the first bindings. We spend strand 1 under strand 2 and above strand 3. We shift four strands into the place of thirds.
- In the same sequence we continue to weave to the end.
- As a result, we get just such a pretty pigtail.
Required tools

To create a braid with a ribbon with your own hands you may need these devices.
Depending on the complexity of weaving and the appearance of the future hairstyle, you may need: ribbons (1 pc.and more), hairpins, stealth, comb with a thin handle, brush, clips, hair spray, etc.
Ribbon as an accessory for creating hairstyles has special advantages:
- It is an inexpensive and affordable accessory.. The price of ribbons, depending on the width and quality, starts from 5-7 rubles per meter (in Ukrainian stores from 1-3 hryvnias per meter).
Tip!
If you really want a braid with a ribbon, but there is no such material at hand, you can use the available tools.
A bright yarn for knitting, folded several times, beads or chains can be useful.
- A tape that contrasts with the outfit or matched to it, can perfectly complement the imagemake it complete.
- Helps to slightly increase the amount of curls, to make from a thin weaving more luxurious braid.
- Ribbon weaving is suitable for fun activities and everyday styling.. It will look equally beautiful in a festive and business setting.
- Having practiced several times laying the strands with ribbons will not take much time..
Hairstyle benefits


Various pigtails have become popular recently. At the beginning of the XXI century, they were considered a relic of years. But the modern fashion industry dictates its own rules.

Braids with ribbons have many advantages:
- This image is suitable for any event: whether it is a walk with a friend or a business meeting, a romantic dinner. Correctly selected tape, the desired type of braids will always be relevant and appropriate,
- A ribbon braid can be worn for several days, even a week. Ribbon makes a pigtail more "tenacious". Thanks to this hairstyle you will save time on fees in the morning, you will be able to sleep longer,
- There is a mass of techniques to weave a ribbon into a braid. They will master even a novice
- In winter, a braid with a ribbon is a very relevant hairstyle. Under the headdress the hairstyle will retain its shape almost not disheartened,
- The main trump card of such styling is that you will amaze everyone with your skills and unusual weaving.
 What are invisibobble hair ties? We have the answer!
Beautiful hairstyle for graduation in the garden look on this page.
These advantages of the ribbon are added to the braids of increasing popularity. So hurry to learn the weaving technique to always be in trend.
How to choose a ribbon for hair


Did you decide to try to weave the ribbon in your hair? Now the question was: which one to choose? The main thing in this case is the material from which the tape is made. Choose tapes from natural materials, without adding different metal frames. The wire can damage the scalp and cause discomfort during sleep.
If you picked up the tape is very bright, then before use, be sure to wash it. After all, it can fade and color the hair, especially light. Such manipulations should be carried out, if you decide to use two ribbons in your hair, they can shed among themselves.

It is necessary to take into account the width of the product. Ideal - 1.5 cm, it is not too thick, it is easy to braid. After all, thin ribbons are constantly twisted, rolled.

Take over all previous tips, then you will find a good tape. As a result, get an amazing hairstyle.
Necessary accessories

Before weaving, prepare all the necessary materials so as not to be distracted from creating beautiful braids:
- ribbon. It should be a little longer than your own hair,
- styling products: lacquer medium fixation, mousse, foam or gel,
- hairbrushes: large with soft bristles, thin with sparse teeth and a pointed end,
- rubber bands: thin and thick, take a few pieces of each type. You can match the color to your ribbon,
- other materials: special hairdressing clips, you can use crabs. Several invisible hairpins, clips.
You can purchase these materials in any specialty store, the price for them is small, they will be useful to you for creating other types of hairstyles.
3-strand classic braid

How to weave a braid with a ribbon? For the first time weaving may fail, do not be discouraged and continue to try. Especially hard if you braid curls on yourself. To get started, try to braid braid on a friend or mannequin. When you put your hand in, it will be easy for you to do your hair with a ribbon on yourself. The simplest option is a spit of three strands, you will master it in a short period of time.

Technique:
- Beautiful hairstyle - clean hair. Remember this rule, so before each new, amazing haircut, wash your hair, carefully comb the strands.
- Then divide the entire head of hair into three identical strands. Tie the middle curl with a ribbon, tie it up.
- Apply the first strand (counting from left to right) to the second, then pass under the ribbon and put on the third.
- Hold the ribbon under the central curl, stick between the second and third strands.
- Continue weaving in the same way. Finish all your hair, secure with a rubber band.
- Make a pigtail tracery can stretch extreme strands. Do it carefully so that the hairstyle is elegant and feminine.
At the end of the weaving, secure the resulting result by sprinkling with a lacquer of medium fixation. With this tool, styling will look natural. Do not use a durable remedy, such varnish can create a crust effect on the head of hair, and this is very ugly.
4 strand weaving option

It’s harder to make a masterpiece out of so many strands, but the result is worth it.


Detailed instructions for weaving braids from 4 strands with ribbon:
- Comb clean curls, divide the hair into four equal parts.
- In the middle, fasten the ribbon, tied at the roots or with the help of a hairpin, immediately cover the hairs slightly.
- Strands count from left to right. We start from the left side of the head of hair. Throw the most extreme strand over the next, pass under the tape.
- Take the rightmost strand, transfer to the third strand, run under the first.
- Repeat the action again.
- Properly braiding the hair, you will notice that the ribbon is hiding, then knocked out. Dole in the same spirit the rest of the shock of hair.
- Secure the finished braid with a rubber band, tie it with a ribbon on top.
- Finally, sprinkle hair with lacquer.
With such a hairstyle you will shine at any event. No man will pass by.
5 strand braid

Weaving a braid with two ribbons is not an easy task. It requires a good level of training, a little effort and patience. But with the following instructions, your braid will come out stunning. With such a hairstyle you will be noticed at the most exquisite party.

Technique:
- To begin, comb your hair, you can sprinkle curls with water from a spray bottle, so the hairs will become pliable, it will be easier to work with them.
- Separate a small portion of the hair at the crown. Under this part of the curls tie the ribbon. Tie a long ribbon so that the knot divides it in half, that is, two ribbons come out.
- Separate the hair on the top divided into three equal parts. Distribute the hairs and ribbons in this order: two strands, a pair of ribbons, and the most extreme strand. The counting is conducted from left to right. Ribbons replace the other two strands of curls.
- Start to weave on the left side, twist the leftmost strand from the second, thread the first under the second, then onto the first ribbon and stretch under the second ribbon. The left hand should hold one curl and a pair of ribbons.
- We begin to take the hair on the right side: we lay the outer strand under the nearby one, put it on one ribbon and pass it under the second one. Ribbons places can not be changed, they remain in their places.
- Repeat the previous steps on the rest of the hair. Just grab the curls from the total head of hair, to get a braid from the whole head of hair. To begin, separate the strand to the left of the temple, attach it to the leftmost strand, start weaving. Spend the connected curl under the second strand and put it on the first ribbon, pass under the second one.In the left hand should remain pryadochka and both ribbons.
- Perform the same manipulations from the second side, pick up the strand to the right of the temple, connect with the extreme curl. Thread through the tape, do not swap them.
- Alternate between the previous steps, you will notice that it turns out an inverted braid of three strands, but with a ribbon in the middle.
- At the end of the weave, tie the tip with a rubber band or ribbon.
- To give a hairstyle volume and openwork can be slightly stretched out the extreme curls.
- Finally sprinkle hair with lacquer.
 How to weave beautiful pigtails for children? See original ideas.
Why are hair split and how to deal with it? The answer is on this page.
At http://jvolosy.com/uhod/shampuni/selentsin.html read reviews of trichologists about Selentsin shampoo.
There are many variations with this scythe. Today you can braid one braid in the middle, tomorrow - a pigtail diagonally, on another day - two braids. Any hairstyle will look gorgeous, riveting the views of others. You will be noticed in any company, they will be considered a handy woman. Do not be afraid to experiment, then your image will always be extraordinary and unusual.
French hairstyle with ribbon

This kind of hairstyle takes started from the French braid. The styling looks stylish and very feminine. With coiled hair, this masterpiece is not ashamed to show even at a gala event.

Step by step:
- Comb the hair, split in half in half. Separate a small part of the curls from the parting, divide it into three equal parts.
- Attach the selected ribbon to the middle curl. Hide the small tip of the ribbon while weaving, so that it does not look out.
- Begin to braid the usual braid, strand on the left and always put the ribbon under the bottom. The pin on the right with the ribbon should always be on top. The main principle of weaving - wrapping ribbon middle pryadochki.
- With each curl, leave the loose strand that is below. Instead, take a new curl, connect with the ribbon and braid on.
- Thus, dock to the other side of the head, you get the semblance of a certain waterfall.
- When the scythe reaches the level of the ear of the opposite side, finish weaving with the usual scythe, fasten it with an elastic band. The hanging braid can be curled in the shape of a flower and decorated with shiny studs.
- At the end of the weaving sprinkle curls with varnish. It is desirable to tuck the horse slightly. With curls this hairstyle looks the most advantageous.
Useful tips


Weave waterfall will help such recommendations:
- if at the first weaving your braid turned out to be a net, then you can periodically fix it with stealth. So the hairstyle will last a long time, will not decay,
- during weaving, constantly pinch the strands with your fingertips so that the weaving is even and beautiful.
Waterfall with a scythe - universal weaving, it is perfect for every day, any holiday. It is necessary only to choose the tape. It is better to choose a contrasting color to your natural hair. So the ribbon will be clearly visible, it will give the image of unusual.
Braid with ribbon: video
Next, a video in which you can visually see the pattern of weaving a braid with a ribbon:
Like this article? Subscribe to site updates via RSS, or stay tuned to Vkontakte, Odnoklassniki, Facebook, Twitter or Google Plus.
Subscribe to email updates:
Tell your friends!
What do you need for weaving?
Before starting work, you should prepare all the necessary things so that nothing distracts you from weaving the most beautiful braids. You will need:
- Tape. Color and width - at will, the length should be much longer than the length of your hair,
- Styling products - spray, varnish or gel,
- Thin gum,
- Combs - thin with frequent teeth and a large brush,
- Crabs, studs, clips and stealth.

Four-strand pigtail
A braid of four strands looks very elegant. On its basis, you can create a lot of different hairstyles.
- Comb the hair on the side parting.On the left side we separate a thin curl, we tie a ribbon at its base (long and folded in half).
- We divide the curl into three identical strands + an additional strand of ribbon. Your task is to create a pigtail of four strands. For convenience, they are best numbered from left to right. Tape assign the third number.
- We skip the first strand under the second and put it on the third. Put the fourth one on the first one and skip it under the third one.
- We repeat the same scheme, adding to the main spit additional strands from the sides. If you follow the numbering, the weaving should look like this: the second, fourth, third and first strand.
- Add hair to the second strand, skip it under the fourth and impose on the third.
- To the first strand we add the hair on the right, put it on the second and skip under the third.
- Repeat steps 5 and 6, finish our pigtail and tie with the same ribbon.
- We weave the same braid on the other side of the parting and tie its tip with a ribbon. Gently pull the weaving wedges.
- We put both pigtails in the form of flowers and fix them with pins. Cut off the extra ends of the ribbons. If you wish, you can braid one of the four strands of braid and leave it hanging loosely on your shoulder.


Spit of three strands, intertwined with a ribbon
Three-splicing is perfectly combined with thin ribbons of different colors.
Step 1. Comb your hair and divide it into three identical parts. The middle part is tied with a piece of tape.

Step 2. Put the first strand on the second, skip it under the ribbon and put it on the third.

Step 3. We hold the ribbon under the central strand and again place it between the second and third.

Step 4. We continue weaving according to this scheme. The tip is tied with a rubber band.

Step 5. Carefully release the links of the braid, making it more open.

In more detail you can look at video:
Tail braid
How to weave a ribbon into a braid simply and quickly? Make a tail - with its help the process will go much faster.
1. Comb and collect the hair on the back of the head in a tight tail. We slip the tape under the rubber band. 
2. Divide the tail in half and pull the ribbon into the middle of the tail. It will serve as the third strand.

3. Place the hair between the fingers of the left hand so that each strand gets its own separate place.

4. Weave a braid according to this scheme:


5. Tie pigtails tied with tape remnants. Excess cropping and evaluate the result:

A scythe can be left free, but you can twist it in the form of a donut.
Interesting option
- We collect hair in a tail.
- We stretch the ribbon under the rubber band and divide it into 4 equal sections.
- We continue weaving braids with ribbon according to this scheme:

4. Tie the tip with a rubber band.

Braids with ribbons can be called real works of art. Those who learn how to properly braid them, have every right to consider themselves masters.
Classic three-strand braid
Before starting to work, grease the head with a special tool that facilitates combing. Divide the entire mass of hair into three parts. The right strand is superimposed on the middle one and turns in the middle. The left is superimposed on the middle (right) and also turns out to be in the middle. In this sequence, continue until the hair is braided to the end.
How to braid braid with ribbons
The principle of weaving with ribbons is the same as that of a regular braid, with the only difference being that in this case the ribbon is added and the work begins not on the right side, but on the left. 
This is done like this:
- The hair is divided into three parts and the middle tie ribbon.
- The left curl is placed on the middle one and, threading it under the ribbon, is placed on the right strand.
- The tape is carried out under the middle strand and is placed between the 2nd and 3rd.
- According to this scheme, it is braided to the end and tied with a rubber band or ribbon.
- The links relax a little to give the hairstyle openwork and lightness.
French braid
Weaving the French braid is available even for beginners, if you perform actions on step-by-step photos, in the following sequence:
- Take a wide strand on the top (the wider, the greater the volume will be at the hair).
- Divide it into three parts. Begin to weave like a normal three-spit braid - the right strand is put on the middle one, and then the left one is put on top.
- Holding the left and middle curls so that they do not disintegrate, take a new one from the right side and attach it to the right strand of the main braid.

- The right side is interlaced with an average, according to the principle of the classic version.
- All curls are taken in the right hand, and a new one is seized with the left hand and woven into the left side. The resulting strand throws on the middle region of the main braid.
- Continue in the same sequence until the end. From the base of the neck continue the classic way.
- Secure with a rubber band.

Danish braid
To weave this braid, the curls should be soft and docile, so just before the start they lightly smear them with conditioner and sprinkle them with water. If at first it is difficult to understand the technique, then you can learn from step-by-step photos for beginners. To make this hairstyle better on the head, which was washed 1-2 days ago, otherwise the hairstyle will not hold and quickly disintegrate. 
Work begins with the top. Take a strand and divide into three parts. The bottom line is that during the weaving curls do not overlap, as usual, and enclosed under the bottom. Sometimes this technique is also called the "French braid vice versa." At the end of the links hairstyle can be slightly relaxed to give volume and fix varnish.
"Fishtail" step by step with photos
- First, the curls are treated with mousse or water, so as not to fluff and combed back (if there is a bang, then it is carefully separated).
- Near the temples take two thin strands (2-2.5 cm) and cross on the back of the head, right over the left.

- These strands are left in the right hand, and the left hand allocate another one. New left cross with the one that was right so that she was on top. The design is easily pressed to the head.
- Again, choose a strand, but from the opposite side. Cross it from above with already interwoven. And so on to the end. All strands should be about the same size.
- Fix with an elastic band.

How to braid braid with rubber bands
Options using two rubber bands:
- With a flip.
Tie a tail (of any height) and divide it into 4 equal parts. The two extremes join together on top of the middle ones, and tie a rubber band on them. Next, divide the lower curls into 2 parts and connect them on top, and also tie a rubber band. The hair that was on top will now be on the bottom. And so on until everyone is woven. 
Knotted tail and separate the top and bottom. They put on a rubber band upstairs, departing from the one that holds the tail, a few centimeters. The lower strand is passed through the top, pulled up and tied with an elastic band. The one that turned out to be the bottom is passed through the top, tied with an elastic band.
And further along the same principle. In the end, you can relax the rings braids, giving the hair pomp. The main thing is to tie gum at the same distance and do not forget to pull them up every time after the locks are pulled up.
Spit twist or harness
This hairstyle is simple, so it is easy to make it to yourself.
- Knotted high or low tail.
- Divided into 2 (or 3) parts.
- Twist each into a bundle, winding it on a finger. It is important - it is necessary to twist in one direction, otherwise it will not work.
- Twist the harnesses between themselves.
Weaving "Waterfall" on medium hair
Weaving braids (step-by-step photo for beginners will help you to understand the technique, and quickly master the creation of even complex modifications) can be carried out in the Waterfall technique. 
Spit "Waterfall" can be:
- four-spin,
- multi-row,
- around the head
- bulk.
Four-way:
Braided on a straight or on a side parting. Separate from the left side 4 strands. Countdown start from the face. The second is the thinnest, the rest are the same in volume. The 1st is performed under the 2nd and above the 3rd, and the 4th is performed under the 3rd and above the 2nd.
Then grab is done - a small amount of curls from the total mass is attached to the extreme strand. Further, the 2nd is carried out over the 3rd, under the 4th.
 Weave braids of four strands suitable for any hair color
The first curl is removed to the side. Replace it with a small amount of hair from the total mass, which is taken from below, and carried out under the 3rd, above the 2nd curl. This is followed by the same combination with the addition of strands, but not only the bottom, but also the top. And so on according to the scheme.
Multi-row spit "Waterfall"
It weaves in a similar pattern, but in several rows. It should be noted that if there are several rows, then it should start at the level of the upper point of the ear. 
Spit should go symmetrically, relative to each other.
- Around the head. It is woven similarly, but from one temple to another. You can finish the classic version or leave uncool.
- Voluminous. To give volume to the hairstyle, they pull out the braids, moving from the end to the beginning, holding the hand. Fix varnish.
Braid waterfall
The hair of “waterfall of braids” is woven along the same principle as the variant just considered, with the only difference that strands that are left and fall freely, woven into thin classic braids.
 Weaving braids waterfall with pigtails step by step with photos for beginners
Four-strand braid
- Hair combed back and divided into 4 parts. The weave of the spit begins from above. Sometimes, for beginners, the principle of weaving is not immediately clear, so many resort to instructions in the form of step-by-step photos.
- The rightmost strand is placed on the next.
- The 3rd and 4th are also placed on the adjacent strands on the left.
- 4th stretch under the 1st so that it was in the middle.
- The 2nd put on the 3rd, and the 4th on the 2nd.

- The 1st put on the 3rd, and the 2nd under the 3rd and so on until the end.
- Fixed with a rubber band or barrette.

Five strand braid
Of the five strands, you can braid a classic or French, Danish or chess braid using tape. The countdown starts on the left. You should consider the basis of weaving a five-spice hairstyle, which is standard for all varieties (depending on the variety, additional steps are added to the main steps). 
- Stage 1 - the first 3 strands are crossed in the same way as when creating a classic look - the 1st one is put on the 2nd and skipped under the 3rd one, it turns out to be between the 2nd and 3rd.
- Stage 2 - the 5th is placed on top of the 4th and passed under the 1st.
- Stage 3 - 2nd over 3rd, under 5th.
- Stage 4 - 4th under the 5th, above the 1st and under the 2nd.
- Continue, starting with the first stage.
At first, you can tie a tail at the back of your head and weave it from its mass.
French bezel
Such styling is done at different lengths, even for short ones.
- The hair is divided by a horizontal parting into 2 parts. One will be braided, and the second will remain uncool and gather in the tail.
- Start from one ear to the other. The principle is the same as that of the ordinary French braid, i.e. with grab ponyadok.
- Secure with a rubber band or invisible, tucking hair inward from the opposite side. Fix varnish.
Spit in spit: master class
- In the area of the temechka, a region of triangular shape is selected so that the top looks inward. The end (the angle of the highlighted triangle) is separated from the rest of the hair, and stabbed, because it will be used at the end of the work.
- The rest of the selected hair is braided using the technology of weaving inside out, i.e. do not put on top, and enclose under the bottom.

- At first, the pinned tail is pulled out and fixed on the top of the head. Tacks should be approximately equal in volume.
- After the main braid is completed, it is slightly fluffed up and they begin to weave a pigtail that will be in the middle of the main braid.
- A thin top pigtail is weaved in the usual way and fixed by invisible women to the main one.

French spiral for long hair
- Basis - bundles laid in a special way.
- The separation takes place in such a way that the letter V is formed on the crown, i.e.Parting is done from the temple to the crown and from the crown to the opposite temple.
- The selected area is shifted to the left and twist the harness clockwise.
- From the left they take a strand, put it on the main one, twist it a little around it and already with it twist into a braid.
- Take a strand on the right side and repeat the above steps, but do not put on top of the main bundle, but under it. In the end, twist and stab invisible.
- The main thing is not to forget that the hair must be constantly shifted from side to side.
Mermaid Spit
Romantic, light and airy image looks spectacular on thin and thick curls and is combined with any way.
- Take the curls at the temples and connect them to the back of the head.
- At the junction begin to weave the usual braid, making occasional grabs on both sides.
- With such pickups, you can weave to the end, but you can limit yourself to a small amount and continue to braid the usual braid.
Braid heart
- Parting is done vertically in the center. One part is fixed with a hairpin so that it does not interfere.
- On the side from which work will be done, make a semicircular parting from the top of the head to the temple, with the help of a thin scallop.
- The bottom curls are also stabbed.


- Work begins at the point at which 2 partings intersect. Weaving technique - French braid. Strand for interlocking take from the top of the head.
- Reaching the area behind the ear, continue to weave on the French technique, but the additional curls are already taken from the middle and bottom. As a result, there is a small tail, which is temporarily fixed with an elastic band.
- On the other hand, repeat the previous steps.
- After the braids are the same length, they are joined together and braided in the middle using the same technique.


Spit snake for girls
Parting is done on the side. A medium length strand is separated from the front and a French purl begins to weave, picking up strands only from the side of the forehead. She has to go parallel to him. 
Then the weaving is turned in the other direction and continues according to the same technique, only now the curls are picked up from the opposite side. Braids should be parallel to each other. In the end, you can leave the tail or doweave until the end.
In the creation of beautiful hairstyles will not remain uncharted moments, if we study techniques of weaving braids by step-by-step photos and detailed instructions that are suitable for beginners.
This hairstyle looks good on the hair of any length. Despite the fact that the technician is already enough: it is three, four and five-strand braids, the waterfall technique, the French and Danish braids, braids with rubber bands, and a snake. Options can be combined with each other, and then the possibilities for changing the image will be even greater.
Weaving with ribbons

Before weaving a pigtail into the ribbon, determine how wide and color your accessory will be.
There are many options for weaving with ribbons. If it seems to you that creating braids with such decorative elements is a very complicated and lengthy process - follow the step by step instructions, and then you will be able to master the most fashionable weaving without much difficulty.
Simple three-spit braid

Simple braid of two strands and a decorative element
Such a braid is woven like a normal three-strand, that is, it is very easy, and it doesn’t matter if the strands are interlaced from below or above. In any case, the hairstyle will be original, and the time for its construction will need a minimum. Instead of ribbon, you can use lace or yarn of any thickness and color.

Cord fastening (ribbon)
To create such a braid, follow the instructions:
- Tie the side of the tail and secure with a thin elastic band.
- Take a decorative element of the desired color and thickness. In our example, a cord is used. The length of the accessory should be 1.5-2 times your hair.
- Wrap a cord with a rubber band on the tail.
- Tie the cord so that the short side of the knot sticks out at a minimum.
- Divide hair into 2 parts.
- Between the two halves of the tail, place the cord that will serve as the third strand for weaving.

- Start weaving according to the simple braid pattern of three strands, the cord is simply playing the role of one of them. To do this, place the right strand on top of the accessory.
- Now cross the left strand from the center.
- On the right was a cord, put it on the strand in the center.
- Take the left strand.
- Put it on top of the cord in the center.
- Now cross the right strand from the center.

The final stage of weaving
- Continue weaving in the same way along the entire length of the hair.
- When you fly a pigtail, fix it with a thin silicone rubber band. Hide the end of the decorative element in your hair or wrap it around the elastic and tie it.
- Spread some strands to increase the volume of the braid.
- Enjoy the original and very simple in creating a pigtail that will suit the representatives of the female of any age.
Kanzashi on tape

This kanzashi looks so beautiful and original on a ribbon in a braid
This option is also based on weaving pigtails in reverse of three strands with pickups. Such braids with ribbons for girls are perfectly suited, and the advantage of this accessory is that the woven kanzashi flowers will decorate the hairstyle of young ladies throughout the day.

These are the tools and fixtures needed.
These flowers on the ribbon can be purchased at handicraft stores or make your own. Of course, homemade accessories will be a bit cheaper. The number of flowers can be different, depending on your desire and the length of the strands.
Note!
In order to weave a braid it was comfortable, the accessory must have certain parameters.
It is desirable that the first flower was made in the form of a hairpin for easy fixation.
The remaining flowers should move freely around the ribbon, and if they are stationary, this will create some difficulties during weaving.

Start creating pigtails
Now, when we figured out what devices we need, we will study in more detail the process of creating such a scythe:
- Comb the hair with a massage brush.
- Take the kanzashi on the tape.
- In this case, there is a hairpin on the first flower for convenient fixation.
- Attach a flower to the side of the forehead.
- Move the interfering strip to the side.
- Separate a small part of the hair from the flower.

The process of creating pigtails
- Divide the strand into 3 parts.
- Place the decorative element on top of the center strand.
- Take the right strand.
- Place it under the center strand.
- Now take the outer strand on the left.
- Swipe it from the bottom center.
The process of creating pigtails
- Spend the rightmost strand under the center.
- To the right, separate a small lock of loose hair and add to the newly woven strand.
- In the same way, weave to the left and add some loose hair.
- Continue this weaving with grabs.
- At a distance of 8-11 cm from the first flower, add one more to the weaving.
- Weave on the braid with ribbon.

The final stage of creating a spit
- At the same distance, add another flower.
- Through the same fourth flower.
- And near the end of the weave, add the last fifth flower.
- Tie the end of the pigtail with a rubber band.
- Enjoy great results.
Original and easy to create braid with ribbon

Create such a hairstyle with ribbon is quite simple
Before you braid a pigtail with a ribbon, you should carefully comb the hair and process it with a styling agent with light or medium fixation. If you do not want to apply such a product before weaving, you can sprinkle with lacquer already finished hair.

Start weaving pigtails
Let's take a closer look at the features of creating such an original hairstyle:
- In the center of the crown, separate some hair.
- Divide this strand into 2 parts and fold them forward.
- Below the separated curls, immediately below them separate the thin strand and tie a ribbon to it, closer to the roots.
- Throw back strands, the tape should appear between them. Lay the right strand over the ribbon.

Photos: the process of creating hairstyles
- Wrap the ribbon over the top of the curl.
- The tape should be centered.
- Lay the left strand over the ribbon.
- Wrap a curl with ribbon and place it in the center.

- Cross the curl on the right with a ribbon.
- Add some loose hair to it.
- Wrap the ribbon around the curl and place it in the center.
- Cross strand with ribbon.

- Add some loose hair to the weave.
- Wrap the strands on the left with tape.
- Continue weaving along the entire length, adding a little loose hair each time.
- When there is no loose hair, tie the end of the weave with a ribbon and secure it with a transparent thin elastic band. The remaining hair is beautifully fastened with a hairpin in the tone of the tape or twist them on a curling iron and leave it falling over the shoulders.
Braid with a bright ribbon diagonally

This hairstyle looks equally great on long and medium length curls
Before weaving a braid into the ribbon, the accessory should be well fixed. You can use stealth or for greater reliability bind a half of the fabric to a thin strand. If the ribbon is very slipping on the hair, a thin silicone rubber band will help to fix it more reliably.

The initial stage of creating a braid of 4 strands
Detailed instructions will help you create such a beautiful hairstyle:
- Step back a few centimeters from the forehead, separate the thin strand and tie a double folded tape to it.
- For a more secure attachment, tie the strand with silicone rubber.
- Separate 3 strands of the forehead of the same thickness so that the ribbon is in the third from the left.
- Stretch the last strand on the left under the second.
- Now stretch it over the ribbon.
- Put the last strand on the next one.

The process of weaving braids
- Now stretch this strand under the ribbon.
- Put this order on the extreme. The lock on the left should be below.
- Now place it on top of the color accessory.
- Stretch this strand under the far right.
- Separate some loose hair and add to the last curl.
- Stretch the enlarged strand in the volume under the accessory.

Completion of the creation of an openwork braid with a ribbon
- Under this order, swipe the far left.
- Add the free part of the hair.
- Continue weaving diagonally.
- When all the loose curls are added to the braid, continue weaving, but without grabs.
- Fix the end of weaving with an elastic band and tie a ribbon.
- From the remaining tape make a beautiful bow. All is ready. You can enjoy a great haircut.
Openwork braid with two ribbons

Such an unusual and original hairstyle with ribbons is perfect for a festive occasion.
Weaving braids with ribbons in this way is not very difficult, and the originality and intricacy of the hairstyle will surely attract attention to you. Contrast ribbons look the most effective in such a hairstyle.

Fastening tapes - the beginning of weaving
Detailed instructions will help you create such a beautiful hairstyle:
- Attach two ribbons of the same width to the well-combed head of hair with a hairpin.
- Separate a small strand on the left.
- Put the ribbon on the strand.
- Wrap the ribbon around the strand so that it moves slightly to the right.
- Now place a second ribbon on top of the curl.
- Wrap it around the strand in the same way.

Weave original braid
- Tighten the ribbons so that the weave is placed in a horizontal position. Fold the end of the strand forward.
- On the right, separate the thin strand of hair.
- Place a ribbon over it.
- Wrap the ribbon around the curl, but now direct the end of the accessory so that the offset is in the left side.
- Place another ribbon on top.
- Wrap the curl in the same way.

The process of creating an unusual hairstyle
- Separate a new strand on the left.
- Continue weaving in this way until there are 3 free locks on the left and 4 on the right.
- Separate the top strand from the rest on the right.
- Cast out the three remaining strands.
- Pull the uppermost strand down.
- Add some loose hair to the curl.

The final steps in creating hairstyles with ribbons
- Spin the strand with ribbons.
- On the left side also take the top curl and add a little hair to it.
- Weave this way and further. To do this, take the top strand from each side and add some loose hair.
- When there are no free curls, continue to weave the braid in the same way, but without grabs.
- Fix the end of weaving with a rubber band and tie it with the remaining tapes.
- Remove the hairpin, and hide the ends of the accessories from the top inside the weave.
- You can fluff a little strand and enjoy the mysterious and beautiful hair for a solemn occasion.
Spit "chess" with two wide tapes

Photo of a magnificent braid of 3 strands and 2 bright strips of cloth
This braid with a ribbon is perfect for any event, it embodies style, beauty and tenderness. To create such a hairstyle, you will need accessories that are at least 1 cm wide. Bright strips with a pattern look very original in this style.

Fixing decorative items
Before you create such a hairstyle, apply a light styling agent to the curls.
Now you can proceed to the very weaving:
- First, separate the wide thin strand in the center of the forehead.
- Throw it forward so that it does not interfere.
- Just below this area, fasten exactly the decorative elements with the help of invisible.
- For reliability, attach the invisibility from the opposite side.
- Divide the hair into 3 strands (2 on the left and 1 on the right of the stripes of fabric).
- Make sure that the ribbons are strictly centered.

In the photo - the continuation of the creation of hair
- Take the leftmost strand.
- Put it on top of the next one.
- Draw under the first decorative element.
- Now lay on top of the second.
- On top of the current order, place the rightmost curl. Add some loose hair to it.
- Now swipe this curl under the first strip of fabric.

- Then lay a curl on top of a strip of fabric.
- Take the extreme strand on the left and place it on top of the next one.
- Add some loose curls to the top.
- Continue weaving this way to the end.
- When the braid is ready, tie a rubber band at the end. After that, make a bow of the remnants of the ribbons, which will best decorate the end of weaving.
- Now your hair is ready, and she is able to perfectly decorate and complement the image. Suitable spit "chess" for any special event.
Unusual openwork braid from one strand and ribbon

Unique braid with ribbon in finished form
This method of weaving is little known. Despite the unusual styling, its creation is not very difficult. The accessory can be used both narrow and wide. You will definitely need a small clip or bar to fix the end of the ribbon on an already braided head of hair.

To avoid mistakes in creating the original styling, follow the instructions:
- In the center of the hair on the crown separate the part of the hair. Below take a thin strand and tie an accessory to it. If the strip slips on the hair, you can additionally fix it with a silicone rubber band.
- Tie the main strand with a fabric ornament.
- Secure the tape with a clip.
- Make a curl from the same strand.
- On the right, grab some extra hair and add to the strand.
- Place the accessory on top of the bend.

The process of weaving single-strand braids
- Tie this part to the left with a strip (when tying, the tape should alternately shift to each side).
- Secure with a clip.
- Form the same curl on the left.
- Add a small loose strand to it.
- Tie a strip with the shift to the right.
- Continue to form curls, add loose curls to them. Do not forget to alternate the offset tape.

The final step in creating a beautiful styling
- When finished weaving, leave 2-3 cm strips, and cut off the excess.
- Secure the end of the accessory and hair with a rubber band.
- Wrap the end of the weave a little under the braid and fasten it with a pin or stealth.
- Lay and smooth gently curls. Spray your hair with lacquer and enjoy the spectacular transformation of your appearance.
Luxurious Hollywood Wave with Ribbon

This braided ribbon braid looks luxurious and elegant.
Of course, such a hairstyle with a bright decorative element will attract many admiring looks. If your hair is naughty, do not rush to do this styling on freshly washed hair. Hairstyle may not hold well, and strands will be difficult to lay.

It is most convenient to use a single decorative element during the weaving of this braid (no need to fold it twice)
To fix the ribbon, you can use stealth. If you need to fasten more securely, take a small clip.
Now let's get down to creating a luxurious Hollywood wave:
- Stand back 2-3 cm from the forehead and attach the ribbon evenly in the center of the head of hair with a small clip. Leave free the edge of the element with a length of 4-5 cm, so that at the end of the weaving it can be neatly hidden in the hair.
- Step back 2 cm from the strip and separate the small strand on the left.
- Stretch the curl under the tape so that it is perpendicular to the strip.
- Wrap the decorative element around the strand and pull out its end to the left so that the wave moves in this direction.
- Pull the element up slightly.
- Separate another curl on the left.

During the weaving of interfering strands away in the direction of the forehead
- Wrap the decorative element also shifted to the left.
- In this way, process 5 strands shifted to the left.
- Take the lower drop curl, and the upper four clean to the side.
- Separate some loose hair on the right and add it to the curl.
- Form a small semicircle from the strand. Put a decorative element on top of the curl.
- Wrap a colored strip of curl with the shift to the right.

During weaving, try to keep the same spaces between curls.
- Take the next strand above.
- Lower it down, add a free curl, form a semicircle a little more than the previous one and wrap a decorative element.
- Take the curl above and repeat step 14.
- Perform the same manipulations with all five strands, gradually increasing the size of the semicircle.

The final manipulation in creating a beautiful wave of hair
- Carry out similar manipulations on the left side, only now do the shift of the color bar to the left side. Do not forget to add loose curls.
- Make as many wave bends as the length of the hair allows.
- When the braid comes to an end, gather the falling strands into one and tie it with a decorative element. Tie a small elastic over the top. Twist the remaining ribbon with a ringlet, attach it to the end of the weaving and knit a transparent elastic band in the center. Straighten the sides of the ribbon, forming a voluminous bow.
- Spray your hair with lacquer and enjoy the admiring glances of others.
Two braids for girls, decorated with ribbon

Photos of simple but beautiful braids, decorated with bright ribbon
This hairstyle is not something unusual or complex. It is suitable for those who want to decorate their hair, but is afraid to experiment with braids, created from more than 3 strands. The hairstyle consists of two three-strand braids over it, interconnected by a beautiful bright decorative element.

Start creating pigtails
Any girl can master such a simple braid with ribbons and at the same time look amazing.Before you start creating braids, carefully comb the hair and divide it with a vertical parting.
Let's learn more about how to create such beauty:
- Separate the strand on the right and divide it into 3 parts.
- Begin to weave an inverted pigtail. To do this, the extreme strand on the right cross under the bottom from the center.
- Then cross with her leftmost lock.
- Continue to cross strands in this way, only further add loose curls to each side of the braid.
- Try while creating a pigtail to place it a little obliquely.
- When the loose curls end, continue to create a scythe without grabs.

Begin ribbon weaving
- Tie the end of the braid with an elastic band.
- Make the same braid on the other side.
- At the level of the ear, draw off a slightly curved spit so that the decorative element can be passed through.
- Stretch colored stripes.
- Now at the same level, stretch it into another braid.
- Match the ends of the accessory.

Perfect braid connection with a bright decorative stripe
- Cross the accessory.
- Insert the element into the lower link of the braid.
- Do the same on the other side.
- Pass the strip on the right into the left braid.
- And pull the left strip through the right pigtail.
- Cross the stripes.

The final touches to creating hairstyles
- In the same way, continue to join the braids with a decorative element.
- Wrap the end of the laying with ribbons and tie.
- Build a bow that will decorate the end of the braids.
- Enjoy beautiful and simple styling.
Original braids with a decorative element

Unusual and beautiful weaving, decorated with a decorative element
The hairstyle is suitable for owners of medium and long strands. It is able to best decorate your daily life, and unusual weaving will add a bit of mystery to your look. You can safely use this styling for the festive event, if you wind the drop strands on the curler.

Start creating a spit
As a result of the effort, the braid with a ribbon will not work right away. The hairstyle consists of two parts interconnected by a decorative element.
And now you will learn how easy it is to make such beauty:
- Separate the hair with a vertical parting.
- Separate the top of the hair.
- Separate beside another strand of hair.
- Cross the left strand with the right, laying the first over.
- Insert the left strand into the hole between the curls. This is a bit like tying a knot.
- Pull a little curl ends.

Creating half the styling
- Connect these strands into one. On the left, separate some more hair.
- Lay them on top of the double strand.
- Tie the knot again.
- That such a pattern should turn out.
- Separate another strand and do the same manipulations with it.
- Continue creating such an unusual pigtail until all the free strands on the left are braided.
Tip!
To make the strands obedient during weaving, use a light fixation styling tool.

Creating a second pigtail and styling a decorative element
- Secure the end of the pigtail with a clip.
- Weave a similar braid on the right.
- Secure the ends of the braids with rubber bands.
- Pull the accessory into the upper left link of the pigtail.
- Also thread the item into the right-hand braid.
- Cross the stripes.

- Thread the accessory into the next link of the pigtail.
- Do likewise on the other side.
- Cross the ends of the accessory.
- Keep joining pigtails in this way.
- Tie the ends of the accessory tightly.
- Tie a bow from the remaining stripes. If you wish, you can decorate your hair with an additional accessory. Your luxury styling is ready for any occasion.
Now you know how to weave a ribbon into a braid in various ways. Creating such hairstyles is a laborious and painstaking process, but having trained it will not seem like something complicated to you.
Be patient, experiment, train and you will succeed.The video in this article will help you take a closer look at the creation of braids with ribbons. Leave your questions and suggestions in the comments.
Interesting ideas of weaving with ribbons
The essence of the braid with ribbons is quite simple. They are either added to the strands, or replace strands in weaving. Try braiding, for example, a braid of four or five strands by replacing some of them with a beautiful ribbon. The result is guaranteed to pleasantly surprise.
Braids with ribbons - it is not only very unusual, but also quite mysterious, it can be said romantically. To master the technique of such weaving to everyone. And for those who already know how to weave the French braids are not difficult at all. Braids with ribbons are the most beautiful decoration of the head for both young ladies and fully grown-up madam.